Showing posts with label chicken. Show all posts

Wednesday, October 20, 2010

Memories that Nourish, Tastes of Home


I know Proust already said it, and lots better than I ever could, but isn't it amazing how one taste or a waft of aroma can instantly transport us to another time and place in our lives? When I smell gingerbread it's Christmas-- and I'm decorating gingerbread men for the tree with DS and the was-band.

For me, popovers are a memory food.

The year that I was three, my mom, my sister, and I lived with my grandparents (my dad's parents) in Port Orchard, Washington.

My grandparents, Elva Isham Brown & Stephan J. Brown, Sr.


My grandmother, in the roaring 20's: a real fashion plate!

My dad had been stationed at Clark Air Base in the Philippines, and there was no housing for us, so we had to stay Stateside.
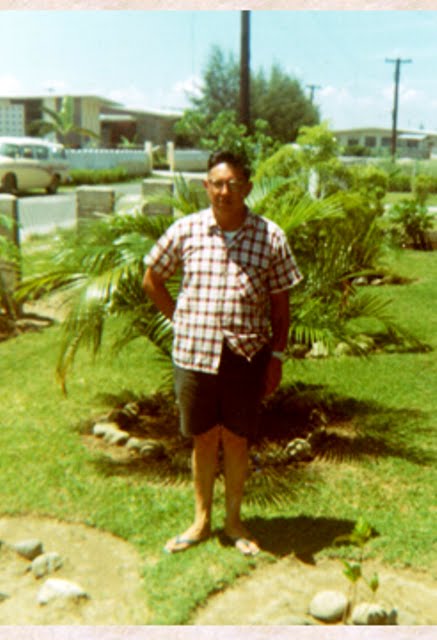

Dad in the Philippines

My grandparents happily welcomed us into the small, green house that my Grampa built with his own hands, when they left the Reservation for the West Coast during WWII.

Grampa and Great-Grandma Brown (his mom) by the front steps
I only met her once, when I was a toddler. She spoke no English, only Anishinaabemowin

The first floor revolved around a central staircase, and I remember that I used to race round and round the stairs, towing a little wooden dog on wheels by his red plastic leash (my favorite toy) in my wake. Grampa and Gramma never told us to "settle down" when we were playing, and my freedom was exhilarating. 22 years later, on a rare visit to Port Orchard, I felt the most intense thrill of recognition as I glanced into the toy basket by the stairs, and saw my battered little dog on wheels, now beloved by the great-grandchildren!

Gramma & I, at the ocean during a visit
(I was 11, and hated being the tallest person in my class)

That little green house was homely- Grampa never got around to sheetrocking the upstairs bedrooms-- but it was full of love.

Grampa & Gramma next to their house

It was always a magical place for me, and for vagabonds like us-- a new year, a new air base-- it was "home" for a good many years. Gramma and Grampa's door was always open-- and their modest home was frequently a safe haven for friends and relatives who might temporarily be down on their luck. Ironically, my grandparents never got over being homesick for Nett Lake, and to them, the Reservation, not Port Orchard, was always "home."

You never knew who might show up on the doorstep. My Uncle Chipper, home on unexpected shore leave, laden with presents. Maybe somebody's cousin's sister-in-law's brother, home on leave from Okinawa, or just out of jail for a drunk and disorderly, or just off the bus from Minnesota and flat busted broke. Someone was always visiting, and miraculously, there was always room for everyone, and everyone always felt welcome. It was just part of who my grandparents were: they would help anyone in need.

Kind of reminds me of the old Indian Country joke about the success of the post-Powwow 49 party: You know it was a good 49 when... you wake up the next morning and there are 50 strangers in your kitchen, cooking your eggs and bacon and calling you "Cousin!"

Everyone was family at the little green house on Locker Rd.

One of my favorite memories is lying in bed giggling with my sister on Sunday mornings, while the enticing smell of popovers in the oven wafted temptingly up the stairs. Although Gramma usually cooked, Grampa always made Sunday breakfast. And he always made popovers. We'd all sit at the kitchen table and my sister and I would stuff our popovers with jam and lick our sticky fingers. I had to be quick, though-- because in a flash, my mom would drag me over to the the kitchen sink and wash my hands so I wouldn't get jam-prints on the tablecloth. My sister, being older, was trusted to make proper use of her napkin.

My sister & I on Easter Sunday in Port Orchard
I believe there was some notion that I was to wear a hat for Easter Mass.
I promptly vetoed this idea.

My Grampa was the sweetest, kindest person I ever knew. He must have mellowed with age, because it was the stuff of family legend that as a young man, he worked as a cook in a lumberjack camp-- and had a cook's fiery temper, too! The closest thing I ever saw to this was Grampa's hearty exhortation to "Eat it or wear it!" on the rare occasions he made dinner.

Chicken pot-pie takes me back to family suppers on Sunday nights in the North Carolina house my parents proudly bought when my dad retired from the Air Force.

My parents, Stephan J. Brown Jr. & Elsie Brooks Brown,
on their first anniversary
(my mom was holding my sister, 2 weeks old, on her lap)


My parents, my sister, & me, a few months old
(you can see why there are almost no baby pictures of me!)

On Sundays, oh joy of joys-- we were allowed to eat on TV trays in the living room so we could watch Mutual of Omaha's Wild Kingdom, followed by The Wonderful World of Walt Disney. I had to rush to get bathed and into my PJs by the time supper was served, because the deal was, I had to go straight to bed after Disney.

After my bath, my mom would safety-pin a towel under my chin to make a super-hero style cape so my long, freshly shampooed hair (thank God for Tame-- remember that stuff?) would not drip on my jammies.

I always loved it best when we got to eat chicken pot pies-- the exotic Swanson's frozen chicken pot pies! I would surgically excise and remove the top crust and eat the filling with relish-- leaving the naked bottom crust untouched in its little tin. Just one bite of chicken potpie, and there I am again, in my towel-cape, listening to Marlin Perkins.

The recipe below is the double whammy of comfort food: Popovers filled with chicken and vegetables in a velvety sauce. It's a great way to use up those little odds and ends in the fridge, and it's quick and easy to make, to boot! I have successfully made both the popovers and the filling with unsweetened almond milk. DS has never noticed.

When the was-band and I lived in Wisconsin, on special occasions, we would eat at a charming restaurant (Quivey's Grove) that had once been a rustic farmhouse. Stuffed popovers were a trademark lunch dish at the restaurant. Kind of a fancy version of chicken and waffles, I guess, sans waffles! My version is below.

Chicken-Pot-Pie Popovers
by DomesticMuse


Popovers: Makes 6 popovers
1 1/2 c. milk
3 eggs
3 T unsalted butter, melted
1 t. salt
1 1/2 c. flour

Chicken-Pot-Pie Filling
2-3 T unsalted butter

3 T flour
1 1/2 c. milk, heated almost to scalding
1 chicken bouillon cube (preferrably Knorr)
1/4 t. dried marjoram
1/2 t. dried thyme leaves
8 oz. cooked, diced chicken
1-1 1/2 c. frozen peas and carrots
Chicken broth to thin the sauce if needed

First, get the popovers going.
Preheat the oven to 425 degrees. Thoroughly grease a popover pan. If you do not have a popover pan, grease 6 glass custard cups and set them well apart on a baking sheet. Space for the hot air to circulate is crucial to success.

In a blender, combine the milk, butter, eggs, and salt. With the motor running, carefully pour the flour in through the hole in the lid (do NOT run the motor with the lid completely off, trust me, you don't want batter in your hair and all over your kitchen.) Blend 2-3 minutes, until there are no lumps. Scrape the sides down with a rubber spatula at least once.

Pour the batter into the popover wells or custard cups, filling them about 2/3 full.

Now, this is important: Bake in a fully pre-heated oven for 30 minutes WITHOUT PEEKING.
If you open the oven door at the wrong time, all will be lost. No one will eat the resulting lumps of styrofoam. I speak from sad experience. A hot oven and undisturbed cooking time is the secret to feathery light, golden popovers.

If you prefer your popovers on the crisp side, briefly slide them out of the oven and poke a hole in each one with a skewer. Turn the oven off and let them sit in it for 5-10 minutes to crisp up.
Otherwise, remove your popovers from the oven and allow to cool for a couple of minutes, then remove from the pan.

Back to the Filling:
While the popovers are baking, spray a sauce pan with non-stick spray and melt the 2-3 T butter over medium heat.

While the butter is melting, you can pour the milk into a glass measure and heat in the microwave until hot but not boiling.

When the butter is melted, sprinkle in the 3 T flour and whisk vigorously with a flat whisk for 2-3 minutes.


Add the marjoram, thyme, and fresh ground black pepper to taste. Still whisking, pour the hot milk into the butter-flour mixture all at once. Continue to whisk, breaking up any lumps and being sure to get into the edges of the pan. Add the chicken bouillon cube, and break apart with the whisk (the Knorr ones are large and soft, so easy to incorporate).

The sauce should thicken up in a minute or two.

Voila! It's sauce now!

Add the peas & carrots and chicken to the sauce. Thin to desired consistency with chicken broth, if needed. Cook, stirring from time to time, until heated through. DO NOT COVER. (See NOTE below.)


By now, the popovers should be out of the oven.

For each serving, split a popover in half and gently nudge the insides around to form a hollow for the sauce.

Ladle the sauce over the popover halves. Some chopped fresh Italian parsley or chives sprinkled on top would be nice, but I didn't think of that until now.

DS's plate:


NOTE: There is a small window of time when the peas will be fairly tender yet still vibrantly green. You want to time it so the popovers are coming out of the oven just as you are adding the vegetables to the pan. If you cover the pan, or if you cook or hold the sauce for too long, your peas won't be pretty anymore.

I recall, as a new bride, proudly bringing a rather pretty casserole (or "hot dish" as it was called in Wisconsin) to a church dinner and being horrified upon lifting the lid to discover that my formerly vibrantly green veggies had turned a sad shade of olive drab. "But it was green when I left the house!!" I said. My friend Steve, glancing from the dish to my stricken face, quipped, "How Green Was My Hot Dish!" and quickly moved out of smacking range.

Happy memories, and Buen Provecho!

Thursday, October 14, 2010

And Then That Rooster Came In Our Yard!


Oh my goodness, I have eaten so much chicken lately I feel like I'm going to start clucking any minute now!! Don't get me wrong, I love chicken-- but it's getting hard to think up new and exciting things to do with it. It's been on sale a lot lately, and I guess I stocked up more than I realized!

Every time I open the freezer and see still MORE chicken, I think about the old song we used to sing at summer camp. You probably know it too!


We had a chicken, no eggs she laid,
We had a chicken, no eggs she laid.
And I said, "Honey, we're losin' money,
'cause that chicken, no eggs she laid."

And then that rooster came in our yard
And caught that chicken right off her guard!
And we have EGGS now, just like we used to!
Ever since that rooster came in our yard.

Each verse gets more ludicrous, from the cow who gave no milk (and we have EGGNOG, just like we used to...) to the gum tree that gave no gum (and we have CHICKLETS just like we used to...) to the Chinese acrobat who did no tricks (and we have EGGROLLS just like we used to...), thanks to that er, helpful rooster!

I kinda wish that rooster would stay out of my freezer! And take the spirit of Herbert "A Chicken in Every Pot" Hoover with him!


To counteract the "I've Got WAY Too Much Chicken Blues,"

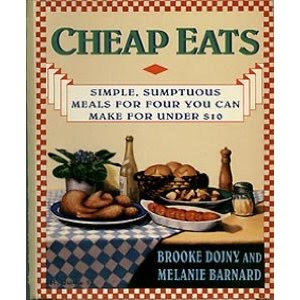
I made an oldie but a goodie from my ancient Cheap Eats cookbook, by the women who used to bring you "30 Minute Meals" in Bon Appetit, Brooke Dojny and Melanie Barnard. (Maybe they still do. My subscription lapsed ages ago.) Rachael Ray probably wasn't even born yet! Well, maybe she was, as I do recall that DS was in his high chair when I acquired this book.


I am rather fond of this little cookbook, which is subtitled "Simple, Sumptuous Meals For Four You Can Make for Under $10." That loud clunk you heard just now was probably Coupon Mom, fainting, since she makes meals for her family of 4 for under $3!! The fun thing about the cookbook is that it's organized by the season of the year and gives complete menus with recipes that are appropriate for the time of the year. Presumably this is because fresh, local and seasonal food would be less expensive. Since dreaming up side dishes is always such a bore, I love the menu feature!

To break out of my chicken rut a bit, I made this simple but unusual recipe from Cheap Eats: Chicken With Garlic Vinegar Sauce. (Shhhhh!! Don't tell anyone, but it's from the Spring section of the book.) DS, who is as fond of intense flavor as I am, loves this recipe. And why not? He was born in the year of (you guessed it!) The rooster!

Despite its humdrum name, this dish is a real change of pace. It's hard to believe something so delicious could come from such simple ingredients. The authors state that "This is an easy-to-make but absolutely stunning dinner for family or special guests. The chicken and the potatoes are inspired by the gutsy, delicious food served in romantic French Bistros."
To me, this dish has a vaguely Spanish flavor. It certainly is gutsy!

The other suggested dishes on the menu include Roasted Parmesan Potatoes, Steamed Asparagus, and Lemon Custard Mousse. I prefer this dish served over a neutral-flavored grain like rice because the sauce is so wonderful you need something to sop it up with! Alas, no asparagus or lemon mousse for us. I served the chicken on a bed of whole grain white rice (?? that's what the label said!) with the frozen veggie du jour.

I forgot to take pictures, but it's no great loss since like many stews, this is not a particularly photo-worthy dish.

Chicken With Garlic Vinegar Sauce
from Cheap Eats


Serves 4

2 1/2-3 lbs. cut-up chicken parts (see note)

1/4 t. salt
1/4 t. black pepper
3 garlic cloves, minced (I used more, of course!)
1/2 t. dried thyme leaves
1/2 t. dried rosemary
3 T red wine vinegar (see note)
1 16 oz. can stewed tomatoes (good luck finding THAT nowadays! I made do with my 14 oz. can)

1. Season the chicken with the salt and pepper. Heat the oil in a large skillet. Add the chicken and saute over medium-high heat, turning, for about 10 minutes, or until browned all over. Use tongs to remove the chicken to a plate. Pour off all but 1 T of drippings.
2. Add the garlic, thyme, and rosemary to the skillet and cook over low heat for 1 minute, stirring constantly to prevent the garlic from burning. (Indeed. it can burn slap up quicker than you would think!) Add the vinegar and simmer, stirring, for 2 minutes. Add the tomatoes and their juices, breaking up large chunks of tomatoes with the back of a spoon. (Hallelujah for canned diced tomatoes!)
3. Return the chicken to the skillet, skin side up, also add any juices that have accumulated on the plate (see note). Partially cover the pan and simmer over low heat for 10 minutes. Uncover and simmer 5-8 minutes longer, until the chicken is cooked through with no trace of pink near the bone, and the sauce is slightly reduced and thickened. Spoon off any excess fat that may have risen to the surface. Taste and season with additional salt and pepper if needed.

That's all there is to it!


Here are my notes:

1. I used split breasts for this recipe, but boneless, skinless chicken also works quite well. If you use skinless chicken, the dish is a tad less flavorful, but you won't have to worry about draining or skimming off any excess fat. (It would also make Dr. Oz happier.)
2. I had run out of red wine vinegar, so I used 1 T balsamic vinegar and 2 T white wine vinegar. You could experiment with different kinds of vinegar to see what you prefer. This combination was quite delicious.
3. I also am apparently out of stewed tomatoes, so I used plain diced tomatoes. I added 1 t. of brown sugar to the skillet to compensate.
4. I am sure I don't need to tell you this, but since I would hate for anyone to get food poisoning, I'm going to anyway. Make sure you thoroughly wash the plate the chicken was on in plenty of hot soapy water before using it again-- to avoid the possibility of cross-contamination with other foods. Both the prevalence and virulence of food-borne pathogens is just scary these days!

Er, uh, Bon appetit!

Saturday, August 29, 2009

DF27: Eat-Clean White Chili

While flipping through the recipes in Tosca Reno's Eat Clean Diet book, I found a white chili recipe that looked pretty good. I did adapt it a little from the way it's written, as I was using canned white beans rather than dry ones. It was just DC and me for dinner and I was pretty sure he'd enjoy the chili.

The Eat-Clean Philosophy is to eat 5-6 small meals a day that include a serving of lean protein and complex carbs. Also, the emphasis is on whole, natural non-processed foods.

Here is the recipe:

Tosca Reno's Hearty White Bean Chili
Makes 6-8 servings

Ingredients:
1 lb. dry great northern beans or white kidney beans, rinsed and picked over
(I used 2 cans of Great Northern beans, rinsed and drained)
4 c. low-sodium chicken broth
2 c. yellow onions, chopped
2 lg. garlic cloves, minced
2 t. ground cumin
1 1/2 t. dried oregano
1 t. ground coriander
1/8 t. ground cloves
1 4 oz. can chopped green chiles
2 lb. boneless, skinless chicken or turkey breast, grilled and cubed
1 t. sea salt

Instructions:
Place beans in a soup kettle or Dutch oven. Add enough water to cover beans by 2 in. Bring to a boil. Let boil for 5 min. Remove from heat and let stand covered for 1 hr. Drain and rinse. Discard liquid.

Place beans in a slow cooker. Add the chicken broth, onions, garlic, and seasonings. Cover and cook on low heat for 7 hrs. or until beans are not quite tender. Add the chiles, chicken and sea salt., Cook for another hr. until beans are tender.

I was able to prepare this soup on the stovetop in about 35 minutes by using canned beans.
Since I don't have a grill, the first thing I did was to season my skinless, boneless chicken breasts and pop them into the oven to roast at 350 for about 30 min.

Meanwhile, I sprayed my soup pot with non-stick spray and added a scant T of extra-virgin olive oil. Oil isn't called for in the original recipe, but since I wasn't going to be slow cooking this soup, I needed the oil to saute the onion and garlic. After the onion and garlic were tender, I added the spices and sauteed for a minute or two; then added the broth, beans, and chiles. I brought the soup to a boil, reduced the heat, and let simmer until the chicken was done.

I cut the chicken into bite-sized pieces and added it and the liquid from the baking sheet to the soup pot.

DC's bowl:


I was feeling pretty good about my so-far sugar free day until I happened to glance at the ingredients in the chicken broth. As I was using the Whole Foods Store Brand Organic Chicken Broth, I had not thought to check its ingredient list first. I was really surprised to see "evaporated cane juice" as one of the ingredients towards the end of the list. Sugar!! Drat!!

I ate the soup anyway. DC and I both thought it was terrific. Two thumbs up! I just need to be sure to get sugar-free broth next time.

I served the chili with crushed blue corn chips on top, and DC had more chips and some of our favorite Jack's Special salsa with his. After having promised him some salsa, I found that ALL the salsa in the refrigerated section at WF contain sugar. Frustrating! So I did not eat any. The chips are sugar free, so I did have just a few of them. But it looks like I may need to make my own salsa if I want it to be sugar-free.

My only criticism of the white chili is that it doesn't include any veggies to speak of, except for the onions, garlic, and small amount of chiles. I'm not sure what would be good in here (that DC would eat), but next time I fix this, I will definitely experiment with adding veggies of some kind to the pot.

Monday, August 10, 2009

DF9: Mexican Lentils with Pineapple and Banana, Chicken Sausages, Baby Zukes


I know you are wondering if I have lost my mind, combining lentils with pineapple and banana. There are some Mexican recipes I have seen over the years that combine fruit with savory ingredients, like dried beans, with one of my favorites being pork with Manchamantel (table-cloth stainer!) sauce, that includes pineapple, mango and chiles. This recipe is from Sheila Lukins' All Around the World cookbook. I noticed it on the way to the sweet potato salad recipe and decided it was worth a try.

Believe it or not, the lentil dish was absolutely scrumptious. Among the many leftovers in the fridge, the lentils are what I chose for lunch today. Sheila pairs the lentils with a tomato sauce enriched with golden raisins, onion and garlic, and then adds the pineapple and banana at the very end of cooking. It has a very bright, sprightly feel to it and was perfect paired with some Cilantro Chicken sausages and baby zucchini.


I noted that aside from the onions and garlic there were no seasonings in the tomato sauce, and so I took matters into my own hands, with good results, I am happy to report. So here is my adaptation of Sheila's recipe.

Mexican Lentils with Pineapple and Bananas by DomesticMuse


Ingredients:
8 oz. dried lentils, picked over and washed well.
1 t. salt
6 c. chicken stock or water or a combination of both
2 ribs celery with leaves, halved
1 carrot, trimmed and halved
8 sprigs Italian parsley
2 T. extra-virgin olive oil
2 medium onions, chopped
4-6 cloves garlic, minced (mine were huge, so I only needed 4)
1 28 oz. can diced tomatoes
1/2 c. golden raisins
2 t. cumin
1 t. ground coriander
1 t. ancho chile powder
salt and black pepper to taste
1 20 oz. can pineapple tidbits, with juice
2 underripe bananas, peeled and cut into 1/2 in. dice

Place the lentils in a saucepan with the chicken stock or water, celery, carrot, and parsley. Bring the lentils to a boil, reduce the heat to medium low and simmer, uncovered, for 20 minutes, or until the lentils are just tender. There will still be some liquid in the pan.

Drain the lentils, remove the carrot, celery and parsley, and set the lentils aside.

While the lentils are cooking, heat the extra-virgin olive oil in a large deep skillet. Add the onions and cook until tender, about 7-8 minutes. Add the garlic and cook for 2 more minutes.
Add the tomatoes (undrained) to the pan, and add the raisins, cumin, coriander, and ancho chile powder. Simmer uncovered over medium heat, stirring occasionally, for about 10 minutes. Add salt and pepper to taste.


Stir in the pineapple and its juice and cook for 5 minutes. Add the bananas and cook for 2 more minutes. Gently fold the lentils into the mixture.

I decided that a nice glaze would be tasty on the sausages. I browned the sausages in a skillet sprayed with non-stick spray, and when they were done, I removed them from the pan. To make the glaze, I melted 2 T. butter in the skillet, and added 2 T each of mango chutney and guava jelly, and 1/2 t. smoked paprika. I added the sausages back the pan and let them baste in the glaze for about 5 minutes before serving. It was really a great combination of flavors and we thoroughly enjoyed the sausages!


This was a great quick meal packed with flavors! I loved the contrast between the sweet and the savory in the lentils, and the sausages were an easy-to-prepare treat. The baby zucchini weren't such a big hit. While I ate mine with relish, DC would not touch his.

DC's plate:

Tuesday, August 4, 2009

DF 3: Chicken Kiev

OK, I have to admit. I did cheat a little on this one by using real butter. But seriously, how much lactose does butter contain? Wait!! Don't answer that!

Ever since 5StarFoodie published her post on Chicken Kiev, I have been dying to try her recipe. DS has always had a passion for all things Russian. Don't ask me where this came from, I have no idea. His dad has almost a second BA in Russian, but that's as far as the connection goes. One of my favorite memories is taking DS to dine at Firebird restaurant in New York when he was 5. If you ever get a chance, you should definitely go there! The whole experience is enchanting, from the breathtakingly gorgeous decor (which includes opulent costumes from the Bolshoi Ballet) to the delectable food to the impeccable service. Our favorite experience was watching the waiter prepare blinis with caviar for the table next to ours. It made such an impression I can't recall a single thing I ate that evening!

I love Eastern European food. When I'm feeling blue in the winter, nothing cheers me up like making a giant pot of borscht with beef. I could (and do) eat it for days. It is the saddest thing in the world to me that DC hates beets.

I don't know what it is about Slavic food, it's just so delicious and so comforting. I was excited when a Czech restaurant opened in downtown Cary this spring. Sadly, I was quite disappointed with my pork gulyas. DC ordered his favorite, Stroganoff, which was prepared with pickles, and quite good. But DS was disappointed with part of his order, too. So it's just dish by dish there, I guess, and expensive enough that I haven't been willing to go back for iffy food.

Here is 5StarFoodie's DAIRY-FREE-ER Recipe for Chicken Kiev. I was kind of in a hurry and didn't take many photos.

This recipe is genius, because the chicken is ground-- which means not only that you don't have to pound it thin, it will be deliciously tender.

Ingredients:

1 pound boneless skinless chicken breast
1 onion
1 egg
½ teaspoon salt
¼ teaspoon black pepper
1 tablespoon chopped fresh tarragon
1/2 stick chilled butter
1/2 cup breadcrumbs
½ teaspoon dried tarragon

Directions:

Put chicken and onion through the meat grinder and into a large bowl.

*I don't have a meat grinder, so I used my food processor. This caused my chicken to be more of a puree. Therefore, I had to add aboout a cup of breadcrumbs to the chicken to make a workable mixture. Also, I'm not crazy about tarragon, so I used fresh dill in the chicken mixture.

Add egg, salt, pepper, and tarragon to the bowl. Mix well by hand until the mixture is smooth. Form two big patties, place on plate or cutting board and flatten them.

Cut the ½ stick of butter in half and roll each half into a thin log. Coat with tarragon on all sides.
*I used a mixture of chopped fresh dill and dried tarragon.
Place one butter log in a middle of each patty, and reshape so that the chicken mixture covers the butter completely.
*My chicken patties were HUGE!!

In a shallow dish, mix breadcrumbs, salt and pepper. Coat the chicken patties with breadcrumbs. Refrigerate for at least 10 minutes.
*Natasha's original recipe calls for an equal amount of breadcrumbs and grated Parmesan. Sigh. I left out the Parmesan and just used breadcrumbs.

Heat the oil in a skillet and brown the chicken patties quickly (1-2 minute per side).

Bake on 375° F, covered, for about 10 minutes or until golden brown

Omigod, even without the Parmesan, this was FANTASTIC!!!! We absolutely loved it. I will be making this again and again. Natasha very fashionably paired this dish with roasted tri-color peppers and truffled mashed potatoes. We had the more prosaic combination of braised baby yukon gold potatoes and green beans. DC disdained to eat the latter. But he loved the chicken! I can't wait to make this for DS! I'll just have to tell him it's, uh, bearnaise sauce! inside the chicken. If he knew it was b-----, he would refuse to eat it.

Just look how gorgeous-- and deee-licious! Here is DC's plate:

Up close and personal:


Thanks for sharing your fabulous recipe, Natasha!! It was AWESOME!!!

Friday, March 13, 2009

When It's Chili Cookin' Time in NC


Then it's Chili Cookin' time in NC!


I am very excited to participate in Gloria Chadwick's monthly Chili Cookoff Challenge for the first time. This contest is part of a big ol' celebration of the publication of Gloria's new cookbook, Foods and Flavors of San Antonio.
A copy of which one lucky person will win by participating in my vintage recipe contest, Everything Old is New Again. Other prizes include some fabulous vintage style aprons. Please come and join the fun! The deadline for submissions is April 1. Check it out!

But back to the important thing: CHILI!

"The aroma of good chili should generate rapture akin to a lover's kiss."
Motto of the Chili Appreciation Society International

As I was developing my recipe for the Chili Cookoff Challenge, I did a little research into the history of chili. Apparently chiles have been cultivated across the Americas as early as 6000 years ago. While the origins of the dish we know as chili are somewhat murky, there is general agreement that it did not originate in Mexico. According to food historian Linda Stradley, chili may have made its first appearance in San Antonio. As you probably know, few things are more hotly debated than what ingredients should be included in a proper bowl of Texas Red. I was intrigued to learn that Tex-Mex Chili con Carne does not include beans, and tomatoes are optional.

In the American Southwest of course, the most important question about chili is "Red or Green?" My friend Sandy, a member of the Navajo Nation, says the thing she misses most about home is green chile. You can learn more about New Mexico chile here.

For my original recipe I have chosen to create neither red or green chili, but a "white" chili honoring the centuries-old traditions of Indian country by including "The Three Sisters": corn, beans, and squash, in my recipe.

The Three Sisters is an ancient method of companion planting used throughout Indian Country, thought to have been first used by the Haudenosaunee people (the Six Nations of the Iroquois Confederacy) of the Northeastern Woodlands. As far as I know, my nation, the Anishinaabe, who call the frozen tundra of Minnesota, Wisconsin, and North Dakota home, were not farmers, though The Three Sisters are included in the traditional foodways of many nations.

They are called "The Three Sisters" because the three crops are planted in the same mound. The corn stalk provides support for the climbing bean vine, the beans add nitrogen to the soil, and the squash leaves choke out weeds by spreading across the ground to create a natural mulch, their thorny fruits a natural deterrent to predators. To lean more about creating a Three Sisters Garden and how you can obtain seeds to grow your own, check this site.


Here is my original recipe for


Three Sisters White Chili


This "white" chili, which isn't so much white as saffron-hued, deliciously combines white beans, white corn, chayote squash and eggplant.

Ingredients:
12 oz. fully-cooked chicken sausages, Spicy Cilantro flavor or Chorizo flavor.
1/2 lb. dried white beans (Great Northern or Navy beans)

6 c. chicken broth (plus more as needed.)

1 bay leaf

1 t. salt

1 T extra-virgin olive oil

1 T unsalted butter

1 lg. onion, chopped

6 lg. cloves garlic, minced

1 poblano chile, stemmed, seeded and chopped into medium dice

1 jalapeno pepper, stemmed and seeded, minced

1 T ancho chile powder

1 ½ t. cumin

1 t. oregano

1 T olive oil

2 T all-purpose flour

1 pt. half-and-half

1 c. shredded Mexican 4 Cheese Blend

1 c. frozen baby white corn kernels

½ eggplant, peeled and cut into ½ in. dice

1 chayote squash, cored and cut into ½ in. strips

1 T tomato paste

1 can Rotel tomatoes with green chiles

⅓ c. chopped cilantro (LEAVES ONLY) plus additional for garnish


It's time to get out my big red soup pot! That always means good things are on the way! I'm going to spray it with non-stick spray, add 1 T olive oil, and heat it over medium heat.


Here are my chicken sausages. I used the Brat Hans brand which my Whole Foods carries, in the Spicy Cilantro flavor. You could also use Chicken Chorizo sausages; or Chicken Italian Sausages. I'd probably go with the spicy Italian, but sweet would be fine too.


Here they are, all naked and ready for slicing and browning.


I have sliced the sausages on the bias (I think they look prettier that way) and am browning them over medium heat.


Here they are, nice and brown! Don't you thing everything looks better browned? Bacon, for example. Or my scary white upper arms. They look MUCH better with a little Fake & Bake! :D


Now take the sausages out of the pot with a slotted spoon and set them aside on a plate. We'll come back to them later.

Into the pot with all the yummy juices from the chicken sausages, add your dried beans (rinsed, of course), a bay leaf, 6 c. chicken broth, 2 c. water, and 1 t. salt.


Bring the beans to a boil over medium high heat, cover, then reduce the heat to medium-low, and cook until the beans are tender but not falling apart. It will take about 2 hrs.
Check frequently to make sure they are not getting too dry, and add additional chicken stock or water as needed.


Now, let's work on our chile-cheese base. Spray a large deep skillet with nonstick spray. Over medium heat, add 1 T olive oil and 1 T unsalted butter.
When the butter is melted, add the chopped onion, salt and pepper to taste, and saute 5 minutes, until onion is translucent.


While the onions are cooking, let's get the chiles ready.
Here are the poblano and the jalapeno chiles:


We're going to stem, seed, and chop them. It's a good idea to use these disposable gloves when working with spicy chiles, and be careful not to touch your face or especially not your eyes while working. We're cutting the poblano into medium dice, and mincing the jalapeno.


Here our chiles are, all ready to be cooked! (At this point, I would wash my cutting board and my knife to get rid of all the irritating hot chile juices.)
Now, mince the garlic and add it to the skillet with the onion, and saute 2 minutes.

Then, add the chiles and cook, stirring, for 3 minutes, or until they are softened and fragrant.


We;re going to add the spices now: add the cumin, ancho chile powder, and oregano to the skillet. Cook them, stirring, for 1 minute. Then add 1 T olive oil to the pan and stir it in.


Now we are going to doux a roux! :) Sprinkle the veggies with 2 T flour. Cook for 2-3 minutes, stirring frequently, to blend the flavors and get rid of any raw flour taste.


Now, add the half-and-half to the skillet.

Cook the mixture, stirring constantly with a wooden spoon or a flat whisk, until slightly thickened, about 5 min. Taste and add salt, pepper, cumin or ancho as needed. Be careful about adding more oregano. Too much will ruin the chili and make it bitter.

Our sauce is all thickened! I love this peachy color, so much prettier than plain old bechamel.


Remove the chili base from the heat and stir in the shredded 4-cheese blend until it is melted and incorporated. To keep with the white chili theme, I should probably only use Monterey Jack, but the 4-cheese blend has much more flavor! Set this mixture aside.


While the beans are finishing cooking, let's work on our veggies.
First, peel the eggplant and cut it in half. Chop one half into into medium dice; reserve the other half for another purpose.
Now let's do the chaoyote. It's kind of like a pear, you have to quarter it so you can cut out the core and seeds. Slice it into strips and set it aside.


This is also a good time to get the cilantro ready. It's very important to wash cilantro well, as it holds a lot of sand. I find the easiest way to do this is to drop it into a sinkful or bowlful of lukewarm water to sit for a while. Lukewarm water is much more effective at getting the dirt out than cold. The sand will fall to the bottom of the sink or bowl. Then carefully lift the cilantro out of the water, and dry. Now comes the tedious part. Remove all the leaves from the stems, and discard the stems. You only want to use the cilantro leaves in anything you are cooking. Your finished dish will look prettier, and taste much better, with no stems.

Here is my bowl of liberated cilantro leaves, ready for chopping.


When the beans are tender but not mushy, we can add our veggies. Here is an important fact about bean cookery: while it is fine (in fact, desirable) to add salt to dried beans while they are cooking, do not add any acidic ingredients, like tomatoes or citrus, until they beans are tender. Acid will make the beans tough. Now add the tomato paste, the Rotel tomatoes, the chopped eggplant, frozen baby white corn kernels, the chayote squash, and the browned sausage (I told we'd get back to that!) to the bean pot.
Add salt and pepper to taste.
I love how you can see the individual beans, corn kernels, pieces of chayote, eggplant, and bits of tomato here.


Bring the bean pot to a boil, reduce the heat to medium, cover and simmer gently for 8 minutes, or until the veggies are just tender. Here are the finished veggies:


Now we are ready to add the cheese mixture to the bean pot.
Sitr it in well, and add salt and pepper to taste as needed. If the chili seems too thick, add a small amount of chicken stock.

Remove from the heat and stir in the chopped cilantro.
Serve in warmed bowls with crusty rolls or cornbread, and offer additional chopped cilantro and cheese, and some sour cream.


LET'S EAT!!

This chili is delicious served with Nathan's Fresh Avocado and Tomato salad (dressed with lime juice, olive oil, and salt).

Here is another serving suggestion.
Three Sisters White Chili is amazingly good ladled over a cooked sweet potato half. We are lucky to have some beautiful NC-grown purple sweet potatoes in the stores now, and I thought it would look cool to serve the chili with a purple sweet potato!

(It is just as delicious served over an orange one, too.)

Here, I tried making some orange bell pepper puree (from a fresh pepper that I roasted) to put on top, but it was a little too thin. It tasted good, though!

I'm sure you will think of many other fun ways to serve this chili!
!Buen provecho!

Three Sisters "White" Chili

In the Southwestern US, corn, squash, and beans are known ...

See Three Sisters "White" Chili on Key Ingredient.


Chi miigwetch SCL: thank you to my son for creating this logo
CLICK to enlarge image