
Showing posts with label Stews/Soups. Show all posts

Sunday, November 21, 2010

Diner-Style Chili & Beer Biscuits


On a chilly evening, what could be more welcome than a nice, hot bowl of chili?


In one of my recent posts, I mentioned that my mom, my sister & I lived with my grandparents the year I was three. I recall my mom making chili throughout my childhood, even in the heat of the Philippines! When we lived in Port Orchard, Mom would occasionally make dinner so Gramma could have a break, and chili was often on the menu on those days. We always had Premium Saltines with our chili.

Unfortunately, I've never been able to duplicate my mom's recipe for chili, which was pretty straightforward, no-frills, American diner-style chili, that was more soupy than stewy. Of course, it's been so many years since she cooked she doesn't remember how to make it.

In May of 1988, I had the rare opportunity to visit Port Orchard. I was living in Wisconsin at the time, and we drove from there to Gramma's house. Sadly, we lost both my dad and Grampa in February of 1987. By then, Gramma was in her eighties. and my Aunt Helen and her three daughters, Nina, Anna, and Amanda, now lived in the little green house with Gramma and took care of her. I was thrilled when Aunt Helen made, guess what! My mom's chili! for dinner one evening, complete with saltine crackers on the side. For whatever reason, I didn't manage to get the recipe.

Recently, I tried Coleen's Turkey and Black Bean Chili and discovered that the flavor is very similar to Mom's chili. Coleen's chili is thicker, but it's just so delicious! If you want a really yummy, easy to fix, no-fuss chili that is not too spicy for kids, Coleen's chili definitely fills the bill.

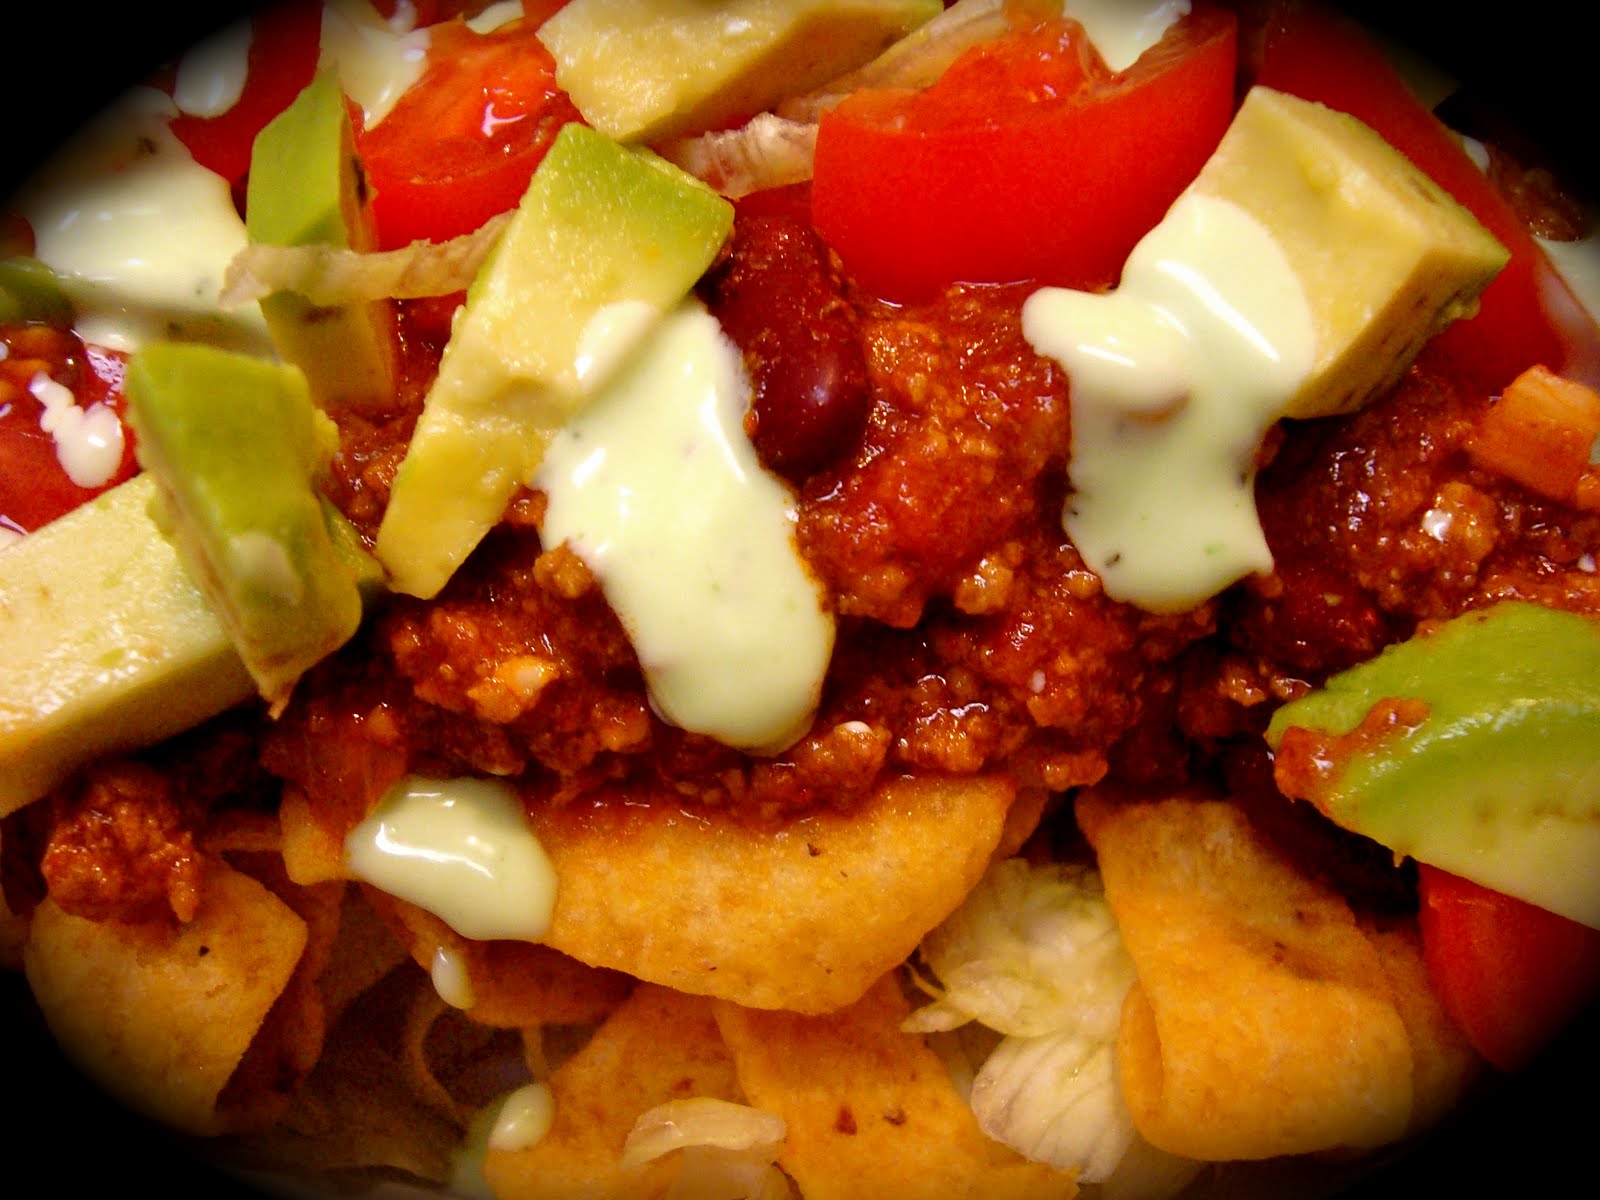
I especially LOVE Coleen's unique way of serving the chili, which reminds me of the Frito Pie so beloved in the Ozarks. We used to take DS to the Springfield, MO Zoo just to pig out on cardboard dishes of Frito pie.... Anyway, Coleen likes to eat her chili ladled over a bed of fresh greens and Fritos corn chips, topped with sliced grape tomatoes, chopped avocado, sour cream, and shredded cheese. This is HEAVEN-- even without the cheese and sour cream. It's a fun study in contrasts, a cool & hot, tangy & velvety, crunchy & chewy chili salad!

Below is my slight spin on Coleen's chili, which really goes back to basics. It is very quick to prep because all you have to do is chop an onion and some garlic and open a few cans. It does need a a couple of hours to simmer and mellow, but you can of course do other things while you're waiting. Instead of saltines, you may enjoy trying the beer biscuits below, which I find are absolutely perfect with chili (not that you need them if you serve the chili with Fritos, LOL!) A big plus is that this chili is actually a really good use for ground turkey (which in general I'm not crazy about)!

Diner-Style Chili Elsie
by DomesticMuse

2 lb. ground beef or ground turkey
1 T canola oil (more, as needed)
1 onion, diced
5 cloves garlic, minced
2 T chili powder
2 t ground cumin
5 c. water
1 12 oz. can tomato paste
1 14 oz. can diced tomatoes with jalapenos
1 T sugar
1 t. salt
2 15 oz. cans kidney beans, rinsed and drained
1 4 oz. can green chiles, chopped

1. Spray a heavy soup pot with non-stick spray. Add the oil and heat over medium-high heat. Add the meat and brown well. Stir until most of the liquid thrown off by the meat has evaporated. If there is excess grease, drain it before proceeding.
2. Reduce the heat to medium and add the diced onion. Saute, stirring, until tender, about 5-6 minutes. Add the minced garlic and saute until fragrant, about 2 minutes.
3. Add the chili powder and cumin and cook, stirring, for 2-3 minutes, until the spices have a chance to really soak into the meat and onion mixture.
4. Add the remaining ingredients and increase the heat to medium-high. Bring the chili to a boil, then reduce to a gentle simmer.
5. Simmer uncovered, stirring occasionally, for 2 hours, or until chili is nice and thick. Taste and add salt and pepper as needed.

DS's plate:

When I met my friend Julia in grad school, I knew I had found a kindred spirit. Julia grew up in Peru, the birthplace of potatoes. She had me in stitches telling me about her first visit to Burger King in the U.S., where she requested a side of mayonnaise with her order. "What for?" the counter dweeb asked. "Why, for my fries, of course!!" Julia replied with offended hauteur, which quickly turned to mortification as she realized that ketchup is the preferred condiment for fries here.

I must confess to a penchant for mayo on my fries, too... but my absolute favorite thing to dip my fries into? Green Goddess dressing, no contest. I love the stuff. Since I am eating my chili sans cheese and sour cream, I was inspired to try a little GG on it. Oh, yeah-- total heaven in my bowl!! I LOVE IT!!

Here's my plate:

Yum-o!!

Here is a closer look at all the scrumptious goodies!

Bubba's Beer Biscuits are the easiest thing in the world to whip up, and are terrific with chili.
This is a completely unadulterated Paula Deen recipe. All I have done is cut it in half so it makes 6-8 biscuits instead of 12-16.

BTW, did any of y'all catch Kristen Wiig's Paula impersonation on SNL last week? I was cracking up as she was going on about all the "boo-ter" and "awl" in the food. Well, for sure don't leave out the boo-ter in the recipe below, or you will end up with brickettes instead of biscuits. NOT a good thing!

Bubba's Beer Biscuits by Paula Deen

2 c. Bisquick or other baking mix
1/4 c. sugar
1 T melted butter
6 fl. oz. beer (any kind will do)

Preheat the oven to 400F. Spray a muffin tin with non-stick spray. In a medium bowl, mix all the ingredients together. Spoon it into the tins. Bake for 15-20 min.

These are not especially pretty, but are so easy and so good.

Buen provecho!


Thursday, October 21, 2010

Remembering Sheila: Porc Colombo


I was shocked and deeply saddened last year when news of Sheila Lukins' untimely death at the age of 66 was reported. I'm a huge fan of Sheila's-- she had a wonderfully original way with food and her recipes never disappoint. Although I have made one or two dishes from Sheila's cookbooks since her death in August of 2009, I've basically surrounded myself in a cocoon of numbness about having lost one of the most inspiring cooks of our times.

According to the NY Times, Sheila's recipes "intrigued, and then guided, the increasingly adventurous palates of New Yorkers." In my opinion, with her 1982 cookbook (written with gourmet shop partner Julee Rosso and Michael McLoughlin) The Silver Palate, Sheila changed the way Americans cook and eat as significantly as Julia Child changed the culinary landscape.

Everyone always said Sheila was the culinary genius behind the Silver Palate, while Julee Rosso was the marketing whiz. That may well have been the case, as I was very disappointed in Rosso's first solo turn, Great Good Food, published in 1993, the year their culinary partnership dissolved.

What I loved about Sheila's work, almost as much as her creativity in the kitchen, was her sense of whimsy and joie de vivre. She was an artist, and her books are filled with her hand-drawn lettering and illustrations, as well as humorous anecdotes. (A particularly funny story concerned the preparation of a roast suckling pig.) The Silver Palate was one of the few cookbooks I owned when I first started cooking. The warmth, whimsy, and sense of fun made me feel I was cooking with a friend in the kitchen.

So, this week when Boston Butt pork roast was on sale in my area, I wondered, what in the heck can you do with a Boston Butt? Then I remembered a pork stew recipe from Sheila's All Around the World cookbook.

Sheila's stew, Porc Colombo, is a rich, West Indian-style curry pork. I also then recalled the comical misadventures suffered by the was-band in procuring the main ingredient. (So I may not want to live with the guy, but he's always had a wonderful sense of humor.)

We had just moved here to Mecca after years of living in the culinary wasteland of the Ozarks. All kinds of ingredients I'd never been able to get were everywhere! I felt like a kid in a candy shop. Sheila's recipe required a mystery (to me) ingredient called boneless pork shoulder. I asked the was-band to please pick some up the next day.

Well, the was-band, being the highly frenetic organism that he is, decided to go to the grocery at 4 or 5 a.m. so as to get a head start on the day. Just being able to go the grocery at that hour was a novelty! Though not necessarily a good idea. The was-band dutifully scoped out the items in the butcher case, but could not find any pork shoulder. There was, however, a mysterious thing called Boston Butt.

He managed to track down the third shift butcher guy and explained that he was looking for pork shoulder. "What's the difference," he asked, "between Boston Butt and pork shoulder?" Meaning, of course, can you pretty much use them for similar purposes?

The butcher guy gave him a puzzled look and said, (I am not making this up) "Sir, it's from the other end of the animal."

O RLY?? I'd never have guessed.

Well, actually, it's not. Boston Butt is also cut from the pork shoulder, but from the blade side as opposed to the arm side. Fat lot that guy knew, eh? I'm not sure what it says about the state of butchering in America when two former vegetarians can figure out that amazing fact in 2 minutes with a web search engine. Don't they teach them that stuff in butcher school?

I figured Sheila's stew would be the perfect use for my super-bargain roast. Somehow, making that wonderful stew, with a main ingredient confusingly called "Boston Butt" seemed as fitting a tribute as any to Sheila. I'm sure she would have gotten a good chuckle out if it!

Here's to you, Sheila! You will always live in our hearts.

Sheila Lukins
November 18, 1942 – August 30, 2009

The recipe below is fabulous. It was inspired by a meal Sheila had at Le Colibri (The Hummingbird) restaurant on Martinique. Although traditionally made with goat, Sheila chose to use pork for her version. My roast, alas, was not boneless, so I had to bone and trim the pork. The stew has some great extra touches. The meat is marinated in fresh lime juice and garlic, and then rubbed with a sugar and spice mixture prior to browning.

The sugar & spice rub for the meat

Sheila includes a wonderful recipe for mixing your own Caribbean curry powder, which I highly recommend. DS hates "curry," but he loved this one. This stew is spicy and flavorful but not spicy-hot, though you could add more cayenne if you'd like to increase the heat. In my bowl was a sumptuous mixture of flavors with the rich, falling-apart tender pork, warm spices, and a medley of carrots, green pepper and sweet potatoes that perfectly played off the sweetness of the spice rub. Sheila suggests serving over rice, though we enjoyed ours plain.


Le Colibri Porc Colombo (Rich Curried Pork) by Sheila Lukins

3 lbs. boneless pork shoulder (or Boston Butt), cut into 2-in. pieces
4 cloves garlic, minced
1/2 c. fresh lime juice
3/4 c. sugar
1 1/2 t. ground allspice
1/4 t. ground cinnamon
2 T olive oil, or more if needed
1 large onion, coarsely chopped
2 T Colombo Curry Powder (recipe follows) or best-quality curry powder
6 c. chicken broth
6 carrots, peeled and sliced into 1/2 in. rounds
12 oz. sweet potato (about 1 1/2-- I just used 2), peeled and cut into 1-in. chunks
1 green bell pepper, stemmed, seeded, and cut into 1 in. pieces
2 bay leaves
2 fresh thyme sprigs or 1 t. dried thyme leaves
5-6 cups cooked white rice

1. Combine the pork, garlic and lime juice in a bowl. Cover and let marinate at room temperature for 1 hour.
2. Combine the sugar, allspice, and cinnamon in a large bowl. Remove pork from the marinade and coat it with the sugar mixture, rubbing it into the meat well.
3. Heat the oil in a large heavy pot over medium-high heat. Brown the pork in small batches, adding more oil if necessary. Remove the browned pork pieces to a bowl.
4. Add the onion to the pot and cook, stirring, over medium-low heat until wilted, 10 minutes. Sprinkle the curry powder over the onion and cook, stirring, for 1 minute. Add 2 T chicken broth if the onions begin to stick.
5. Return the pork to the pot along with the carrots, sweet potatoes, and green pepper. Add the bay leaves, thyme, and chicken broth. Bring to a boil, reduce the heat, and simmer, partially covered, for 30 minutes. Uncover and simmer over medium heat until the pork is tender, about 45 minutes. Remove the fresh thyme (if using) and bay leaves and serve with white rice.
Serves 6-8

Here's my stew, just before adding the chicken broth and simmering.
We were too hungry to take photos of the finished product, but if I get a chance, I'll add one later. (We have leftovers!)

Colombo Curry Powder by Sheila Lukins


1 T. ground coriander
1 t. ground fenugreek
1/2 t. ground cinnamon
1/2 t. ground cumin
1/2 t. ground black pepper
1/4 t. ground allspice
1/4 t. ground ginger
1/4 t. ground turmeric
1/4 t. ground cardamom
1/4 t. dry mustard
1/8 t. ground mace
Pinch of cayenne pepper

Mix all the ingredients together in a small bowl. Makes just over 2 T.

This makes the perfect amount for the pork stew above, but if you plan to store it, transfer to an airtight jar and store in a cool dry place.

I actually had all the ingredients for the curry powder on hand, except the ground ginger, which I had run out of and needed to get anyway. I only had whole fenugreek seeds, but it took just a few seconds to grind them in my electric spice grinder (it's really a coffee grinder, but I don't drink coffee). I am embarrassed to admit this, but I bought the seeds for an Indian food fest shortly after we moved here. Evidently I've got a lifetime supply of fenugreek seeds. I love fenugreek leaves (aka Kasoori Methi) and the seeds taste pretty similar-- sort of reminds me of fresh basil.

And to all those movers over the years who have scoffed at me for tenderly packing up my spice collection, who's laughin' now??

Saturday, August 29, 2009

DF27: Eat-Clean White Chili

While flipping through the recipes in Tosca Reno's Eat Clean Diet book, I found a white chili recipe that looked pretty good. I did adapt it a little from the way it's written, as I was using canned white beans rather than dry ones. It was just DC and me for dinner and I was pretty sure he'd enjoy the chili.

The Eat-Clean Philosophy is to eat 5-6 small meals a day that include a serving of lean protein and complex carbs. Also, the emphasis is on whole, natural non-processed foods.

Here is the recipe:

Tosca Reno's Hearty White Bean Chili
Makes 6-8 servings

Ingredients:
1 lb. dry great northern beans or white kidney beans, rinsed and picked over
(I used 2 cans of Great Northern beans, rinsed and drained)
4 c. low-sodium chicken broth
2 c. yellow onions, chopped
2 lg. garlic cloves, minced
2 t. ground cumin
1 1/2 t. dried oregano
1 t. ground coriander
1/8 t. ground cloves
1 4 oz. can chopped green chiles
2 lb. boneless, skinless chicken or turkey breast, grilled and cubed
1 t. sea salt

Instructions:
Place beans in a soup kettle or Dutch oven. Add enough water to cover beans by 2 in. Bring to a boil. Let boil for 5 min. Remove from heat and let stand covered for 1 hr. Drain and rinse. Discard liquid.

Place beans in a slow cooker. Add the chicken broth, onions, garlic, and seasonings. Cover and cook on low heat for 7 hrs. or until beans are not quite tender. Add the chiles, chicken and sea salt., Cook for another hr. until beans are tender.

I was able to prepare this soup on the stovetop in about 35 minutes by using canned beans.
Since I don't have a grill, the first thing I did was to season my skinless, boneless chicken breasts and pop them into the oven to roast at 350 for about 30 min.

Meanwhile, I sprayed my soup pot with non-stick spray and added a scant T of extra-virgin olive oil. Oil isn't called for in the original recipe, but since I wasn't going to be slow cooking this soup, I needed the oil to saute the onion and garlic. After the onion and garlic were tender, I added the spices and sauteed for a minute or two; then added the broth, beans, and chiles. I brought the soup to a boil, reduced the heat, and let simmer until the chicken was done.

I cut the chicken into bite-sized pieces and added it and the liquid from the baking sheet to the soup pot.

DC's bowl:


I was feeling pretty good about my so-far sugar free day until I happened to glance at the ingredients in the chicken broth. As I was using the Whole Foods Store Brand Organic Chicken Broth, I had not thought to check its ingredient list first. I was really surprised to see "evaporated cane juice" as one of the ingredients towards the end of the list. Sugar!! Drat!!

I ate the soup anyway. DC and I both thought it was terrific. Two thumbs up! I just need to be sure to get sugar-free broth next time.

I served the chili with crushed blue corn chips on top, and DC had more chips and some of our favorite Jack's Special salsa with his. After having promised him some salsa, I found that ALL the salsa in the refrigerated section at WF contain sugar. Frustrating! So I did not eat any. The chips are sugar free, so I did have just a few of them. But it looks like I may need to make my own salsa if I want it to be sugar-free.

My only criticism of the white chili is that it doesn't include any veggies to speak of, except for the onions, garlic, and small amount of chiles. I'm not sure what would be good in here (that DC would eat), but next time I fix this, I will definitely experiment with adding veggies of some kind to the pot.

Thursday, August 13, 2009

DF12: Ground Beef Minestrone


After the disaster wtih the chickpeas and the cauliflower, it was a relief to cook something I knew everyone would love: Ground Beef Minestrone. It is one of my old standbys. When I pulled the recipe out of my binder, I saw the date: this recipe came from the Oct. 1990 issue of Gourmet Magazine! I've made a few minor alterations over the years.

Last week, we made the "plain" version of bean soup, Minestra. Today, we're making the fancier "big" bean soup, Minestrone. It calls for prosciutto, and uses a mixture of celery, carrot and onion, along with red wine, to add a real punch of flavor to this quick-cooking soup.

An accompaniment of gremosalata is suggested for topping the soup, but both because I was in a hurry and also due to the Peccorino Romano in it, I didn't bother. However, it really does add a lot to the soup, with the grated lemon zest bringing out the best flavors in the parsley, cheese and soup.

We needed to pick up just a few things at the Teeter, and DC happened to be with me. So he got to pick out the bread to go with the soup. I pointed out some knot rolls, but DC had his eye on the "butterflake" rolls. They were nestled tenderly in their own little disposable muffin tin! They were amazingly good for supermarket bakery rolls-- they tasted like croissants in roll form. Soup and bread!! My favorite!

Ground Beef Minestrone

Extra-virgin olive oil
1 lb. ground sirloin
2 oz. prosciutto, diced
1 lg. onion, diced
3-4 cloves garlic, minced
1 carrot, chopped
2 celery stalks, with leaves, chopped
1/2 t. dried rosemary
1 14 oz. can diced tomatoes
1 20 oz. can kidney beans, drained and rinsed
4 c. beef broth
1 c. dry red wine
1/3 c. small pasta, such as orzo

Gremosalata:
1/3 c. freshly grated Romano cheese
1/2 c. minced Italian parsley
1 clove garlic, minced
1 T grated lemon zest

Mix ingredients together in a small bowl, and top the soup with the mixture.

For the Soup:
1. Spray a large soup pot with non-stick spray and heat over medium heat. Add 2 T. extra virgin olive oil, and when the oil is hot, add the ground sirloin and the prosciutto. Cook until the beef is nicely browned and there is a nice brown glaze on the bottom of the pan.

Here is my prosciutto, diced and ready for the pan! I accidentally bought twice as much as I needed. (Oh well... )


2. Remove the browned beef and prosciutto from the pot with a slotted spoon, and set aside on a plate.

I like to brown the meat separately from the vegetables, because it never really gets a nice brown color duie to the moisture from the vegetables, if you saute them at the same time.


3. Add the mirepoix (onion, celery and carrot mixture) and crumble the rosemary into the pan, adding more oil as needed, and saute until the vegetables are tender, about 7-8 minutes. Add the garlic and cook for 2 more minutes.


4. Return the browned meat to the pan, and add the tomatoes, and the red wine. Bring to a boil, then reduce heat and simmer for 10 minutes.

5. Add beef broth, the drained and rinsed beans, and the pasta to the soup. Bring to a rolling boil, then simmer for an additional 10 minutes, or until the pasta is tender. Add salt and pepper to taste.

I don't know what is wrong with my brain lately, but I keep forgetting to take pictures before serving the food! I guess we were hungry and intent on eating rather than documenting, LOL! If you've seen one bowl of minestrone you've seen them all?

Saturday, August 8, 2009

DF7: Tuna Melt and Creamy Tomato Soup Makeover

One of my favorite go-to meals when I'm pressed for time is tuna melts and creamy tomato soup. When we combined households, I was pleasantly surprised to find that DC is crazy about tuna melts! He would happily eat them every week. DS is going through a phase where he won't eat them, so I only make them when he's at his dad's.

I figured this dairy-free thing would mean the end of my old standby. What's a tuna melt without the melt? That's kind of the whole point! Well, with a few adjustments, I managed to create dairy-free versions of both the sandwiches and the soup!

And DC ate every bite! SCORE!!

I used a recipe from The Ultimate Uncheese Cookbook to create a block "uncheese" version of Colby cheese. Again, it was quick and simple to make. This provided a "melty" cheese to top my tuna melts. Here is the recipe:

Colby Cheez from The Ultimate Uncheese Cookbook
Free of gluten, soy, corn; Contains nuts


1 1/2 c. water
5 T agar flakes or 1 1/2 T agar powder
1/2 c. roasted red peppers (seeded and peeled) or pimiento pieces
1/2 c. chopped raw cashews or skinless Brazil nuts
1/4 c. nutritional yeast flakes
*juice of 1/2 fresh lemon
2 T sesame tahini
2 t. onion powder
1 t. salt
1/4 t. garlic powder
1/4 t. dry mustard

Lightly oil a 3-cup storage container and set aside.

Combine the water and agar in a small saucepan ad bring to a boil.


Reduce the heat and simmer, stirring often, until dissolved, about 5-10 minutes.

Transfer to a blender and add the remaining ingredients.

Here are my dry ingredients. I forgot to chop the cashews so I had to pick them out of the bowl and give them a good chop!

Process several minutes until completely smooth, scraping down the sides of the blender jar as necessary.

Pour into the prepared container and cool uncovered in the fridge. When completely cool, cover and chill several hours or overnight. To serve, turn out of the container and slice. Store leftovers covered in the fridge. Will keep 5-7 days.

Here's the finished cheez, cut in half for slicing:


We enjoy a product sold at WF called Roman Tuna Salad, which I now make at home. This is the filling for our tuna melts. It's quick and easy to make and packs a lot of great flavors. The amounts below are just approximations, use as much or as little of each ingredient as you like. DC has been under the impression that he does not like olives most of his adult life, but after trying this salad, remarked, "I can't believe I'm saying this, but the olives just kind of MAKE this salad!" I think he just hadn't tried olives, especially kalamata olives, since he made up his mind at age 7 that olives were not for him. :)

DomesticMuse's Roman Tuna Salad

Makes enough to fill 4 open-face sandwiches generously, with a bit leftover

1 lg. can solid-pack albacore tuna, drained and flaked
4-5 artichoke hearts, marinated or water packed, chopped
1/4 red onion, finely chopped
1/4 roasted red pepper, chopped
6-7 pitted kalamata olives, halved
Mayonnaise (preferably Hellmann's ) to taste
Salt and pepper to taste

Combine the tuna, artichokes, red onion, roasted pepper, and olives in a medium bowl. Add mayo to taste. This salad is so flavorful and moist from all the veggies you don't need a lot of mayo. A couple of squirts from the plastic bottle is usually plenty for us. Combine the mayo and tuna mixture well. Add salt and pepper to taste.


To make the Tuna Melts, toast 4 slices of whole grain bread. Preheat the broiler. Place the toasted bread on a foil-lined baking sheet. Cover each slice generously with tuna salad. Top with cheese and run under the broiler until the cheese melts and is bubbly, 2-3 minutes for dairy cheese, about 5 minutes for the Colby uncheese.


Here are the sandwiches topped with the sliced Colby Cheez:


And here they are, after going under the broiler:


Serves 2-4, depending on how hungry you are and what else you're serving. Sometimes we only eat 1 openface sandwich apiece. The extras make good leftovers for lunch the next day.

To go with the Tuna Melts, I wanted to try making a dairy-free version of creamy tomato soup. I was in the mood for Italian flavors for the soup, and noticed that the WF store brand bottled pasta sauce not only already contained onions, basil, and other Italian seasonings, it was a lot cheaper than the canned tomatoes. I decided to give it a try as the basis for my soup, figuring it would go together quickly, though not as fast as the Pacific brand ready-made Creamy Tomato Soup I often indulge in.

The pasta sauce I bought is the 365 Organic Pasta Sauce, Classic flavor, which comes in a 25 oz. jar.

Here is what I ended up with:

Italian Tomato Bisque By DomesticMuse


To make this vegan, substitute margarine for the butter and vegetable broth for the chicken stock.

Ingredients:

2 T. butter
2 T. unbleached all-purpose flour
1 c. plain soymilk
1/2 jar ready-made tomato pasta sauce (without cheese, check label)
1 1/2 c. chicken broth
salt and pepper to taste
1/2 t. sugar
1 T sesame tahini

1. First, make a roux by melting the butter over medium heat in a medium saucepan. Add the flour and cook, whisking, for 2-3 minutes.
2. Meanwhile, place the soymilk in a glass measure and heat in the microwave until hot but not boiling, about 1 1/2 minutes.
3. Add the hot soymilk all at once to the roux, and cook, whisking constantly, until mixture comes to a boil and thickens, about 2-3 minutes.
4. Add the pasta sauce and the chicken broth to the white sauce in the pan. Combine well, cover, and cook until heated through, about 5 minutes.
5. Add salt and pepper to taste, Whisk in the sugar and the tahini, which gives the soup a nice creamy texture and some richness. Taste and adjust as necessary, adding more salt, pepper, pasta sauce, chicken broth or soy milk until you are satistifed with the combination of flavors.

Serve in warmed mugs along with the Tuna Melts.

Now, for my reviews!

Block Colby Cheez

The agar is used as a "jelling" agent for the cheez, like gelatin. It is the only ingredient so far that I thought was expensive, with a bag of the flakes selling for about $8. When I realized it was just vegan gelatin, I thought, well, shoot! I have a box of plain Knox gelatin, I could have just used that! Well, the agar actually has a major advantage over the Knox. It sets up incredibly fast, even when warm. I had to put mine back on the stove for a minute to try to melt it some because I wasn't quite finished prepping the rest of the ingredients when the agar first dissolved. Definitely get it into the blender as soon as it's dissolved, because it will start setting immediately. Also, it produces a much firmer texture than regular gelatin, a plus if you are trying to make a product you can slice and grate.

The cheez was cool enough to cover as soon as it came out of the blender, and was ready to use in just a few hours. I didn't taste it cold, as most vegan cheeses are pretty disgusting that way. It unmolded easily (I had sprayed the mold with nonstick spray). It was also easy to slice, though I had trouble getting the slices thin enough. Practice, I guess! I ended up using a knife to slice it instead of a cheese wire. Maybe I'll try the cheese wire next time. I was a little afraid it might crumble with the wire, but I think it might be ok.

Since I didn't taste the cheez cold by itself, I won't give any ratings. However, it did come out nice and firm, with an attractive color, and it smelled good.

Tuna Melts with Colby Cheez

We found the finished sandwiches to be just as delicious as ones made with dairy cheese. The main difference is in the texture. Since non-dairy cheese contains no casein, it doesn't get bubbly and stretchy when it melts. It just kind of sits there. However, the flavor was wonderful!

Color: 3 stars. It was certainly nice and orange, like real Colby
Texture: 2 stars. It was smooth and creamy, but not at all like melted cheese. Though not unpleasant to eat by any means. I found I liked that it wasn't oily like melted dairy cheese.
Cheese Flavor: 3 stars: Cheesy! Yummy!
Taste: 2.5 stars: Delicious when hot. I'm giving it 2.5 stars instead of 3 only because I would not eat this sliced cold on a sandwich. I think it would make delicious macaroni and cheese when grated and melted into a cheese sauce. It was quite yummy hot on the sandwiches.
Overall: 2.5 stars: Very tasty melted on the sandwiches. I probably wouldn't serve this to guests, but it definitely makes it possible for me to enjoy a delicious dairy-free tuna melt!
DC-O-Meter: He liked it, and felt the flavor was cheesy. His exact words: "I prefer real cheese, but I ate every bite, didn't I?" We both did. No leftover sandwiches.

Italian Tomato Bisque

A very good alternative to tomato soup made with cream. This was quite tasty indeed. It was rich, creamy, and flavorful from all the seasonings in the pasta sauce. The tahini did not affect the flavor, but did wonders for making the soup creamy.

DC particularly enjoyed this soup. My only problem with it was that it contained some tough bits of tomato with skin, that I had to spit out. If I still had my immersion blender, that would take care of the problem. Alternatively, I guess I could strain it before serving, but then we'd miss out on the tasty onion bits.

The ease of preparation using the prepared sauce over canned tomatoes that I put through the food mill, plus not having to chop and cook onions or fresh basil, I think outweighs the texture issues. I will definitely make this again.

I used to make tomato soup with Progresso Crushed Tomatoes, but I haven't been able to find them in stores the past couple of years. I noted yesterday that the Teeter had them. I may give them a try, too, instead of the pasta sauce, when I don't want a soup with Italian flavors, but just a plain old fashioned cream of tomato.

2.5 Stars

Thursday, August 6, 2009

DF5: Soup, Glorious Soup!


Soup is one of the world's perfect foods. S0 delicious, so versatile, so comforting. Nothing says "Welcome home!" like a steaming hot bowl of soup on a snowy day. Nothing is so refreshing in the dog days of August like an icy bowl of white gazpacho, with tangy yogurt, crisp cucumber, and cool green grapes. Like Italian food, I could happily eat soup every day-- and did for years when I worked outside my home. Every Sunday I made a giant vat of the Soup de la Semaine, and took the leftovers to work with me for lunch every day that week. So dependable was this routine that once when I was in a hurry and grabbed a frozen entree for lunch instead, my whole department said, incredulously "You brought frozen food?!?" So soup is a wonderful and nourishing timesaver because it only gets better the longer it sits in the fridge. Up to a point, of course. ( I wouldn't advocated eating spoiled food!)

The recipe below is a BIG favorite of DS's and mine. It's my version of Rachael Ray's 30 Minute Minestra, the famous "beans and greens" Italian soup. You're probably more familiar with Minestrone, the no-holds-barred version of this soup. This soup is more your everyday kind of soup. It's very flexible and adaptable.

Sometimes I used dried beans and let them simmer for a couple of hours on the stove. Sometimes I use dried beans and cook them in the pressure cooker. And sometimes I used canned beans, if I'm tired and rushed. Same for the chicken stock. While its at its absolute zenith of deliciousity with homemade chicken stock, you can use prepared stock. I like either the Pacific or Imagine Brand of organic chicken stock. Whatever you use, it still tastes great! I'm going to give you the pressure cooker version below, even though this time I cheated and used canned beans.

DomesticMuse's 30 Minute Minestra


1 lb. dried white beans (Great Northern or Cannellini), washed well and picked over
2 qt. chicken stock
2 t. kosher salt
1 t. olive oil
2-3 T Extra-virgin olive oil
1/4 lb. pancetta, diced (I ask for one thick slice at the deli counter)
1 onion, diced
6-7 cloves garlic, minced
1/4 t. fresh grated nutmeg
1 lb. bag of frozen chopped greens (fresh escarole is traditional, but you can use just about anything except spinach. Frozen greens are great because you don't have to wash and chop. I often use turnip greens or collards. The turnip greens are more peppery, but collards are a little sweeter Sometimes I use a mix of collards, turnip greens, mustard greens, and beet greens.)
salt and black pepper to taste

If you are using canned beans, you need two cans, rinsed and drained. Add them with the chicken stock in step 5. (Obviously skip the bean cooking steps in this case!)

Directions


You have a choice here. You can either cook the beans in the chicken stock (more flavorful) and use the whole she-bang in the soup, OR you can cook the beans in salted water and drain off the water before you add the beans to the soup. Pouring off the cooking liquid gets rid of some of the indigestible sugars in the beans that give them the name "the musical fruit."

1. Spray the pressure cooker with nonstick spray. Add the washed beans, the chicken stock or 2 qt water, 2 t. salt, and 1 t. olive oil. Lock the lid on, bring to a boil over high heat until maximum pressure is reached, then reduce the heat and simmer at maximum pressure for 15 minutes. Remove the pot from the heat and let the pressure release naturally while you prepare the rest of the soup.
2. Spray a large soup pot with nonstick spray and add the 2-3 T olive oil. Heat the oil over medium heat and add the pancetta.
3. Cook the pancetta over medium heat, stirring frequently, until it's nice and brown.

4. Add the onion and garlic, and cook until the onion is translucent and softened, about 5-6 minutes.

5. If you did not use the chicken stock to cook the beans, add it now to the soup pot. If you used water to cook the beans, the pressure should be released by now, so unlock the lid and test for tenderness. The beans should be just right, not too mushy, not too hard. If they are too hard, put them back on stove at high pressure for another 5 minutes, and then quick-release the pressure. Drain the beans if you used water. Add the beans to the soup pot with the chicken stock. If you used the chicken stock to cook the beans, unlock the lid and carefully pour the contents into the soup pot.
6. Add the chopped frozen greens and the nutmeg to the soup. Bring the soup to a boil and and simmer for 15 minutes, or until the greens are tender.

7. Add salt and pepper to taste. If you cooked the beans in the stock the Minestra will be thicker, so add water if you like it thinner.

This is delicious with a hunk of garlic bread or, surprisingly, brown bread muffins, which have a great affinity for bean soups of all kinds. Today I served some simple sandwiches on the side. I used toasted Prairie Bread from WF and layered Fra Mani Salame Rosa and Mortadella between the slices. I like one side spread with dijon and the other with mayo. You can dress these up or down with roasted red peppers and for the dairy eaters, cheese, if you like. We just had them plain. Don't you just love soup and sammie meals?


For those who do NOT have to eat dairy free, this soup is positively ambrosial topped with generous amounts of freshly grated Parmigano Reggiano. It's still delicious without the cheese, however. But like many things in life, EVEN BETTER if you add cheese!

Chi miigwetch SCL: thank you to my son for creating this logo
CLICK to enlarge image