
Showing posts with label baking. Show all posts

Wednesday, October 20, 2010

Memories that Nourish, Tastes of Home


I know Proust already said it, and lots better than I ever could, but isn't it amazing how one taste or a waft of aroma can instantly transport us to another time and place in our lives? When I smell gingerbread it's Christmas-- and I'm decorating gingerbread men for the tree with DS and the was-band.

For me, popovers are a memory food.

The year that I was three, my mom, my sister, and I lived with my grandparents (my dad's parents) in Port Orchard, Washington.

My grandparents, Elva Isham Brown & Stephan J. Brown, Sr.


My grandmother, in the roaring 20's: a real fashion plate!

My dad had been stationed at Clark Air Base in the Philippines, and there was no housing for us, so we had to stay Stateside.
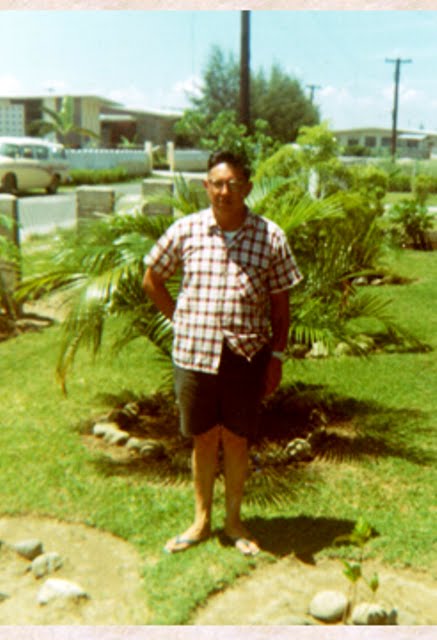

Dad in the Philippines

My grandparents happily welcomed us into the small, green house that my Grampa built with his own hands, when they left the Reservation for the West Coast during WWII.

Grampa and Great-Grandma Brown (his mom) by the front steps
I only met her once, when I was a toddler. She spoke no English, only Anishinaabemowin

The first floor revolved around a central staircase, and I remember that I used to race round and round the stairs, towing a little wooden dog on wheels by his red plastic leash (my favorite toy) in my wake. Grampa and Gramma never told us to "settle down" when we were playing, and my freedom was exhilarating. 22 years later, on a rare visit to Port Orchard, I felt the most intense thrill of recognition as I glanced into the toy basket by the stairs, and saw my battered little dog on wheels, now beloved by the great-grandchildren!

Gramma & I, at the ocean during a visit
(I was 11, and hated being the tallest person in my class)

That little green house was homely- Grampa never got around to sheetrocking the upstairs bedrooms-- but it was full of love.

Grampa & Gramma next to their house

It was always a magical place for me, and for vagabonds like us-- a new year, a new air base-- it was "home" for a good many years. Gramma and Grampa's door was always open-- and their modest home was frequently a safe haven for friends and relatives who might temporarily be down on their luck. Ironically, my grandparents never got over being homesick for Nett Lake, and to them, the Reservation, not Port Orchard, was always "home."

You never knew who might show up on the doorstep. My Uncle Chipper, home on unexpected shore leave, laden with presents. Maybe somebody's cousin's sister-in-law's brother, home on leave from Okinawa, or just out of jail for a drunk and disorderly, or just off the bus from Minnesota and flat busted broke. Someone was always visiting, and miraculously, there was always room for everyone, and everyone always felt welcome. It was just part of who my grandparents were: they would help anyone in need.

Kind of reminds me of the old Indian Country joke about the success of the post-Powwow 49 party: You know it was a good 49 when... you wake up the next morning and there are 50 strangers in your kitchen, cooking your eggs and bacon and calling you "Cousin!"

Everyone was family at the little green house on Locker Rd.

One of my favorite memories is lying in bed giggling with my sister on Sunday mornings, while the enticing smell of popovers in the oven wafted temptingly up the stairs. Although Gramma usually cooked, Grampa always made Sunday breakfast. And he always made popovers. We'd all sit at the kitchen table and my sister and I would stuff our popovers with jam and lick our sticky fingers. I had to be quick, though-- because in a flash, my mom would drag me over to the the kitchen sink and wash my hands so I wouldn't get jam-prints on the tablecloth. My sister, being older, was trusted to make proper use of her napkin.

My sister & I on Easter Sunday in Port Orchard
I believe there was some notion that I was to wear a hat for Easter Mass.
I promptly vetoed this idea.

My Grampa was the sweetest, kindest person I ever knew. He must have mellowed with age, because it was the stuff of family legend that as a young man, he worked as a cook in a lumberjack camp-- and had a cook's fiery temper, too! The closest thing I ever saw to this was Grampa's hearty exhortation to "Eat it or wear it!" on the rare occasions he made dinner.

Chicken pot-pie takes me back to family suppers on Sunday nights in the North Carolina house my parents proudly bought when my dad retired from the Air Force.

My parents, Stephan J. Brown Jr. & Elsie Brooks Brown,
on their first anniversary
(my mom was holding my sister, 2 weeks old, on her lap)


My parents, my sister, & me, a few months old
(you can see why there are almost no baby pictures of me!)

On Sundays, oh joy of joys-- we were allowed to eat on TV trays in the living room so we could watch Mutual of Omaha's Wild Kingdom, followed by The Wonderful World of Walt Disney. I had to rush to get bathed and into my PJs by the time supper was served, because the deal was, I had to go straight to bed after Disney.

After my bath, my mom would safety-pin a towel under my chin to make a super-hero style cape so my long, freshly shampooed hair (thank God for Tame-- remember that stuff?) would not drip on my jammies.

I always loved it best when we got to eat chicken pot pies-- the exotic Swanson's frozen chicken pot pies! I would surgically excise and remove the top crust and eat the filling with relish-- leaving the naked bottom crust untouched in its little tin. Just one bite of chicken potpie, and there I am again, in my towel-cape, listening to Marlin Perkins.

The recipe below is the double whammy of comfort food: Popovers filled with chicken and vegetables in a velvety sauce. It's a great way to use up those little odds and ends in the fridge, and it's quick and easy to make, to boot! I have successfully made both the popovers and the filling with unsweetened almond milk. DS has never noticed.

When the was-band and I lived in Wisconsin, on special occasions, we would eat at a charming restaurant (Quivey's Grove) that had once been a rustic farmhouse. Stuffed popovers were a trademark lunch dish at the restaurant. Kind of a fancy version of chicken and waffles, I guess, sans waffles! My version is below.

Chicken-Pot-Pie Popovers
by DomesticMuse


Popovers: Makes 6 popovers
1 1/2 c. milk
3 eggs
3 T unsalted butter, melted
1 t. salt
1 1/2 c. flour

Chicken-Pot-Pie Filling
2-3 T unsalted butter

3 T flour
1 1/2 c. milk, heated almost to scalding
1 chicken bouillon cube (preferrably Knorr)
1/4 t. dried marjoram
1/2 t. dried thyme leaves
8 oz. cooked, diced chicken
1-1 1/2 c. frozen peas and carrots
Chicken broth to thin the sauce if needed

First, get the popovers going.
Preheat the oven to 425 degrees. Thoroughly grease a popover pan. If you do not have a popover pan, grease 6 glass custard cups and set them well apart on a baking sheet. Space for the hot air to circulate is crucial to success.

In a blender, combine the milk, butter, eggs, and salt. With the motor running, carefully pour the flour in through the hole in the lid (do NOT run the motor with the lid completely off, trust me, you don't want batter in your hair and all over your kitchen.) Blend 2-3 minutes, until there are no lumps. Scrape the sides down with a rubber spatula at least once.

Pour the batter into the popover wells or custard cups, filling them about 2/3 full.

Now, this is important: Bake in a fully pre-heated oven for 30 minutes WITHOUT PEEKING.
If you open the oven door at the wrong time, all will be lost. No one will eat the resulting lumps of styrofoam. I speak from sad experience. A hot oven and undisturbed cooking time is the secret to feathery light, golden popovers.

If you prefer your popovers on the crisp side, briefly slide them out of the oven and poke a hole in each one with a skewer. Turn the oven off and let them sit in it for 5-10 minutes to crisp up.
Otherwise, remove your popovers from the oven and allow to cool for a couple of minutes, then remove from the pan.

Back to the Filling:
While the popovers are baking, spray a sauce pan with non-stick spray and melt the 2-3 T butter over medium heat.

While the butter is melting, you can pour the milk into a glass measure and heat in the microwave until hot but not boiling.

When the butter is melted, sprinkle in the 3 T flour and whisk vigorously with a flat whisk for 2-3 minutes.


Add the marjoram, thyme, and fresh ground black pepper to taste. Still whisking, pour the hot milk into the butter-flour mixture all at once. Continue to whisk, breaking up any lumps and being sure to get into the edges of the pan. Add the chicken bouillon cube, and break apart with the whisk (the Knorr ones are large and soft, so easy to incorporate).

The sauce should thicken up in a minute or two.

Voila! It's sauce now!

Add the peas & carrots and chicken to the sauce. Thin to desired consistency with chicken broth, if needed. Cook, stirring from time to time, until heated through. DO NOT COVER. (See NOTE below.)


By now, the popovers should be out of the oven.

For each serving, split a popover in half and gently nudge the insides around to form a hollow for the sauce.

Ladle the sauce over the popover halves. Some chopped fresh Italian parsley or chives sprinkled on top would be nice, but I didn't think of that until now.

DS's plate:


NOTE: There is a small window of time when the peas will be fairly tender yet still vibrantly green. You want to time it so the popovers are coming out of the oven just as you are adding the vegetables to the pan. If you cover the pan, or if you cook or hold the sauce for too long, your peas won't be pretty anymore.

I recall, as a new bride, proudly bringing a rather pretty casserole (or "hot dish" as it was called in Wisconsin) to a church dinner and being horrified upon lifting the lid to discover that my formerly vibrantly green veggies had turned a sad shade of olive drab. "But it was green when I left the house!!" I said. My friend Steve, glancing from the dish to my stricken face, quipped, "How Green Was My Hot Dish!" and quickly moved out of smacking range.

Happy memories, and Buen Provecho!

Friday, August 14, 2009

DF13: "Unstuffed" Shells, Modena Mountain Bread, and Antipasto salad


Today I tried out a new vegan cheese dish, "Unstuffed Shells" from The Ultimate Uncheese Cookbook. It simplifies the typical "stuffed" shells dish by simply tossing the pasta with the vegan ricotta cheese mixture, and then topping everything with a tomato sauce.

Not knowing how successful this attempt at cheesy shells would be, I decided to create a hearty salad to go along with them, sort of like an antipasto platter in a salad bowl. I had some wonderful Fra Mani salumi in the freezer, not enough to make more than 1 sandwich from, so this was a great way for everyone to enjoy the mortadella and salame rosa and not let them go to waste.

I have been wanting to make some homemade bread for the longest time, and this seemed like a great opportunity. If the shells turned out awful, we'd have salad and bread to fall back on! I chose the Modena Mountain Bread from Lynn Rosetto Kasper's marvelous The Splendid Table. It's very rustic, and includes potato and wheat berries in the dough.

First, the shells recipe. I used Pipe Rigate a sort of half-round pasta, instead of the shells. Owing to a "new" orthodontic device (Herbst appliance), DS is prone to choking. I was a little worried he might inhale a shell!

"Unstuffed Shells" from the Ultimate Uncheese Cookbook.

1 lb. firm regular tofu
1/3 to 1/2 c. vegan mayonnaise
2-3 T minced fresh parsley
2 t. dried basil
2 t. onion powder
1 t. garlic powder
1/2 t. salt
2 c. (1 16 oz. can) tomato sauce* see below
4 c. medium shell pasta

Break tofu into large chunks. Place in a saucepan and cover with water. Bring to a boil, reduce heat, and simmer 5 minutes. Drain well and mash fine.

Combine tofu, mayonnaise, and seasonings in a large bowl. Mix well and set aside

Heat the tomato sauce and keep warm. Cook the pasta according to package directions. Drain well and combine with reserved tofu mixture, tossing until evenly distributed.

Divide among 4 dinner plates, and top each with some of the tomato sauce.

I made the following adjustments to this recipe: I used Hellmann's mayonnaise, to taste. About 1/3 c. After cooking and draining the tofu, I used the food processor to combine it with the other ingredients. Mashing fine didn't work for me, it left all kinds of icky lumps. Using the food processor yielded a texture more like ricotta cheese.

A note about seasonings: I dislike using onion and garlic powders, but concede it is sometimes necessary when a concentrated flavor is needed without adding the bulk or moisture of the real thing. Actually, fresh garlic probably would work fine here in place of the garlic powder. The powders taste "off" to me, and worse, tend to linger on the palate for several hours after dinner.

My ratings for the Tofu Ricotta Cheese:
Color: 3 stars. It looked like ricotta with herbs mixed in.
Texture: 3 stars. It pretty much had the texture of ricotta cheese.
Cheese Flavor: 1.5 stars: while it was reminiscent of cheese, a raw, beany flavor from the tofu still predominated when the cheese was cold. However, when warmed by the hot pasta ans sauce, this was much less pronounced, and the finished dish was fairly tasty.
Taste: 2 stars: Good; but not by itself. In the dish, the flavor was not unpleasant, just a bit different. With pasta and tomato sauce, the beaniness was much reduced. If you like tofu, this probably won't be an issue for you. I wonder if cooking the tofu a little longer would help with the raw taste.
Overall: 2 stars: Good. I would eat this again, but I would not serve it to guests. Actually, I will not serve it to DS again, as he just couldn't handle the vegan cheese. I will add, however, that he does not like dairy ricotta or lasagna.
DC-O-Meter: "Tastes fine with the tomato sauce on it. I would eat it again."

I made my own quick tomato sauce by sauteeing half and onion and 2 cloves of garlic in a little olive oil and the dressing from a jar of marinated artichoke hearts. I added about half a jar of ready-made pasta sauce, 1/4 c. red wine, and the artichoke hearts and cooked until everything was heated through.

This added a really delicious touch to the dish. With plain tomato sauce, I doubt this pasta would be palatable to most people. With my doctored-up jarred version, it was both quick to prepare and tasty. I really liked the pipe rigate in this dish, too. They are a bit smaller than shells, and less "hefty."

Antipasto Salad by DomesticMuse
This is really more of an idea than a recipe. It's good for using up little odds and ends of things. Artichoke hearts would be delicious here, but since I had put them in the pasta sauce, I didn't add them. Here's what I put in the salad:

Romaine salad mix
3 slices Fra Mani salame rosa, julienned
3 slices Fra Mani mortadella, jullienned
9 cherry tomatoes, halved
1/4 roasted red pepper, chopped into large dice
1/2 pkg. button mushrooms, quartered, blanched and marinated
1/4 cauliflower head, broken into tiny florets, blanched and marinated

Divide ingredients among 3 salad bowls, adding as much or as little salad mix as you like.


For both the marinade and the dressing, I used an heirloom family recipe, my Aunt Edith's Italian Dressing. DS loves it, it's his absolute favorite. It's really more of a light vinaigrette than what most people would consider Italian dressing.


Aunt Edith's Italian Dressing

1 c. corn or other mild vegetable oil
1/4 c. fresh lemon juice
1/4 c. red wine vinegar
2 heaping t. Worcestershire sauce
2 cloves garlic, sliced fine
2 t. salt
4 t. sugar

Mix all ingredients except the corn oil in a blender or food processor. With the motor running, add the oil in a slow steady stream until it's incorporated and the dressing is emulsified.


The bread is one of my favorites, one that I haven't made for a long time. I always start it the night before, to give the sponge time to preferment. I usually prep the wheat berries and potato the night before as well, and zap gingerly in the microwave, stirring well to prevent hot spots, to bring it to room temp before adding to the dough.


Modena Mountain Bread from The Splendid Table

Sponge:
2 T. unbleached all-purpose flour
1 1/2 t. granulated yeast (I always cheat and just use the whole little packet)
1/4 c. warm (110F) water
2 c. unbleached all-purpose flour
1 c. warm water (110F)

Dough:
5-6 oz. red skinned potato
1/2 c. (3 oz.) wheat berries
1 c. (4 oz.) whole wheat flour
2 1/4 t. salt
4 1/2 c. unbleached all-purpose flour
1 T. flour (for sprinkling loaves)

Sponge: Make the sponge 16-22 hrs. before you plan to bake the bread.
In the bowl of a stand mixer, stir together the 2T flour, the yeast, the 1/4 c. warm water. Let the mixture stand 5 minutes, or until the yeast is bubbly.

Add the 2 c. flour and 1 c. warm water and beat on medium speed for 1 minute. Scrape down the sides of the bowl, cover tightly with plastic wrap, and set aside at room temperature for 12-18 hrs.


Dough:
To prepare the potato, boil the unpeeled potato in water to cover 30 minutes, or until very tender.

Drain, reserving 10 T of the cooking liquid. Cool and peel. Puree the potato with the reserved cooking liquid. Cook the wheat berries in fiercely boiling water to cover for 10 minutes,
or until tender

Drain and cool. Crush lightly in a food processor, blender, or mortar and pestle. Set the potato and wheat berries aside at room temp. If working ahead, cover and refrigerate, and bring to room temp before adding to the dough.


Combine the sponge, potato puree, wheat berries, whole wheat flour, salt, and 2 c. of the unbleached flour. Beat with the paddle attachment at medium speed for 2 minutes. Beat in another 1/2 c. of flour and switch to the dough hook. Gradually add enough of the remaining flour to make a sticky dough. The dough will be soft but holding its shape around the dough hook while it cleans the bottom and sides of the bowl. If it puddles at the bottom, add a few T of flour. The dough should be very elastic, soft, and a little sticky. Knead about 10 minutes in the mixer.

Lightly oil a large bowl. Add the dough, turn to coat with oil, and cover with plastic wrap.

Set aside to rise at room temp 2-3 hrs., or until the dough is 21/2 to 3 times its original size. It will look blistered and soft. No harm will come to the bread if you let the dough sit as long as 8 hrs.

Lightly oil a cookie sheet with olive oil. Place a jelly roll pan on the floor of a gas oven or the lowest rack of an electric oven.

Punch down the dough and knead it about 5 minutes. Divide the dough in half and shape each half into a ball, tucking the dough under itself until you have a taught sphere.

Set the two pieces of dough on the oiled cookie sheet. Sprinkle the dough with the 1 T flour. Cover with a kitchen towel and let rise at room temp 1 1/2 hrs., or until doubled.

Preheat the oven to 400 F. Make sure the rack is in the center of the oven. Place the cookie sheet with the two loaves on it in the oven. Pour 3 c. boiling water into the jelly roll pan, and close the door to capture the burst of steam. Bake 40 min. Turn the loaves over and bake another 10 minutes, or until the loaf sounds hollow when tapped. Remove the bread from the oven and place the loaves on a rack to cool. Allow to cool 1 1/2-2 hrs. before cutting.


And here is DC's plate:


!Buen provecho!

Sunday, August 2, 2009

DF 1: Vegan Carrot Cake Cupcakes with Cream Cheese Frosting


Here we are, Day 1 of the Challenge!

Normally, if I want to buy a book, I just order it from Amazon. It's usually cheaper than at my local bookstore, and since I'm a Prime member, I get free 2-day shipping. However, since I needed some info on non-dairy baking and cooking immediately, I made a quick trip to B & N. Actually, not that quick, since I had a whole list of books I wanted to look at and I browsed them all carefully before making my selections. While browsing, it became quite evident that

Cheese. Is. Going. To. Be. A. Problem.

I can already see that's going to be the biggest challenge of going dairy-free. Just to clarify, when I say "dairy-free" I mean no milk products, cow or otherwise, like milk, cream, cheese, yogurt, ice cream, and yogurt. After today's experiment, I'm thinking I may still use butter, at least in some recipes.

I grabbed a few vegan cookbooks to browse through and realized that they will be helpful mainly in the baking area. As far as creating dairy-free versions of other dishes, I may be on my own here. This is because not only do I have to watch it with the dairy, I also have to take it easy on simple carbs that have a high glycemic index value, like rice and potatoes. So a macaroni and "cheez" dish consisting of pasta, rice milk, nutritional yeast flakes, water, potato starch, and veggies is gonna send me zooming to the moon sugar-wise only to crash and burn severely in about 40 minutes. I was so excited to find a recipe for creamy tomato soup (my favorite!) only to realize I could never eat it because the creaminess was created by the addition of more than a lb. of potatoes to the soup, a sure recipe for a crash and burn.

Whereas dairy milk and cheese in a standard mac and cheese recipe bring some protein, calcium, and most importantly, FAT, to the party. For my body, fat is a good thing, because it slows everything down and keeps the carbs from slamming into my bloodstream like a rocket. The protein helps balance things out too.

From experiences in the past with low-fat diets (remember Susan Powter and Stop the Insanity?) I am only too aware of a dreary underworld of pseudofoods, created solely to taste like something else. E.g., fat-free salad dressing. Non-dairy cheese also falls into this category. Sometimes, a "pseudofood" tastes good and provides a good nutritional value. Soysage, for instance. I love it-- prefer it, even, to real sausage because it isn't greasy. It's loaded with soy protein and "good" fat.

But I just have to wonder about the benefit of some of the other pseudofoods that are out there.

To make the delicious cupcakes below, I used two products new to me, coconut milk yogurt and vegan cream cheese. The recipe calls for soy yogurt, but at the store, vanilla and plain soy yogurt was only available in a huge vat, which I didn't want to invest in. One reason being the dr. told me to avoid highly processed soy products. The coconut milk yogurt was available in vanilla in a single serving size, so I decided to try it for the recipe.


Compared to regular yogurt, coconut milk yogurt is a bit watery and "thin," but it tasted fine. It did NOT taste like yogurt, but it did taste sweet and vanilla-y. It also worked fine in the recipe. It even has 6 active and live cultures, according to the label.

But check out the ingredients: water, coconut milk, vanilla, evaporated cane juice, pectin, chicory root extract, dextrose, natural flavors algin (kelp extract), magnesium phosphate, tricalcium phosphate, rice starch, locust bean gum, agar, culture, carrageenan, guar gum, dipotassium phosphate, vitamin B 12. The primary ingredients are water, coconut milk, and sugar. Plus emulsifiers.

Checking the nutrition label, I see a carton has 150 cals., with 50 of them coming from fat (so 33% fat). There are 22 grams of carbs, 19 grams of sugar and 2 grams of fiber. I gram of protein. It provides no vitamin A or vitamin C, but does provide 25% of the daily value for calcium and magnesium, as well as 30% of your B12 and 8% of your iron.

Let's compare that to my usual yogurt, Fage 2% Greek yogurt. It also has 150 cals per serving, with 40 cals from fat (26% fat). There are 9 grams of carbs and sugars, but of course, this is plain and not vanilla so it should be lower. No fiber, but 20 grams of protein. No iron, no vitamin C, 2% DV for Vitamin A, and 25% calcium. (Magnesium and B 12 aren't listed.)

And here are the ingredients for the Fage yogurt: milk, cream, and active cultures. That's it.

Clearly, the Fage is a cleaner and more natural food, and has the advantage of providing a significant amount of protein in addition to the calcium. I'm not saying the coconut milk yogurt is bad. If I had soy and milk allergies, the coconut milk yogurt would be a godsend! I'm just saying because something is "non-dairy" that doesn't automatically make it nutritious. In fact, the health benefits to me in the Fage yogurt might mean it's a food I would not eliminate, but would try to eat less of.

The vegan cream cheese is gluten free, has no trans or hydrogenated fats, no cholesterol, no preservatives, no dairy, and no sugar. It seems to consist primarily of palm fruit oil and soybean oil, with some chicory root extract, agave syrup, lemon juice and rice starch thrown in. Like regular cream cheese, it's mostly fat, with 90 calories per serving, 70 of them from fat. But obviously, this is a much healthier food than regular cream cheese.


Which brings me to the other issue with "pseudofoods." Taste.

I understand that something that is NOT dairy cannot be made to taste exactly like its dairy counterpart. However, for me, it has to taste reasonably similar, and it also has to taste good. The texture can be totally off, but if it tastes good, it works for me. WF carries a vegan chocolate mousse. Does it taste like real chocolate mousse? No, but it has a similar texture and certainly does ring my chocolate chimes, and is delicious besides. Someimes I even deliberately buy IT when I'm in the mood for something chocolate.

But the vegan cream cheese?? Not so much. While I wouldn't call the taste unpleasant, it unfortunately tastes an awful lot like mayonnaise. DC tasted it and agreed: mayonnaise. Which means I'd have a hard time eating it spread on a bagel. I'd be wondering where the rest of my sandwich went. The prospect of putting it in the cupcake frosting alarmed me, but since this is the first time I've tried these cupcakes, I wanted to follow the recipe as given. And surprisingly, it turned out ok.

If this tells you anything, DS, who hates cream cheese and cream cheese frosting with a vengeance, had 2 cupcakes and licked his fingers. Actually, we all did. They really were quite tasty!

Here is the recipe, from Vegan Cupcakes Take Over the World:


(Vegan) Carrot Cake Cupcakes with Cream Cheese Frosting

12 standard cupcakes

Ingredients:
2/3 c. all-purpose flour
3/4 t. baking soda
1/4 t. baking powder
1/4 t. salt
1/4 t. ground cinnamon
1/4 t. ground ginger
2/3 c. sugar
1/3 c. vegetable oil
1/3 c. soy yogurt (plain or vanilla)
1 t. vanilla
1 c. finely grated carrots
1/4 c. chopped walnuts
1/4 c. raisins

1. Preheat oven to 350F. Line a muffin tin with cupcake papers, and spray top of tin with nonstick spray.
2. Cream together the sugar, oil, and vanilla.

3. Sift together the dry ingredients and combine well. Add to the wet ingredients and mix until combined.
4. Fold in the carrots and walnuts.

5. Fill the tins 2/3 full, and bake for 26-28 minutes, or until an inserted toothpick comes out clean.
6. Cool in the pan for 10 minutes, then turn cupcakes out onto a rack to cool completely.


Vegan Cream Cheese Frosting


1/4 c. non-hydrogenated margarine, softened
1/4 c. vegan cream cheese, softened
2 c. confectioner's sugar
1 t. vanilla

Cream the margarine, cream cheese, and vanilla together. Add 1 c. of the powdered sugar and beat well. Add the remaining sugar in 1/4 c. increments, until you are satisfied with the texture.

Pipe the frosting on the completely cooled cupcakes.

The authors suggest rolling the edges of the frosted cupcakes in 1/3 c. chopped walnuts, but I didn't bother.

MY REVIEW:
The cupcakes were delicious. However, the recipe could use a little tweaking. I barely got 10 cupcakes out of the batter. I think I will increase the flour next time to 1 c. I'm also going to be sure to pack the carrots down when measuring. Also, I doubled the amounts on the cinnamon and ginger, and they came out tasting great. I think they would be bland as written.

I'm a little puzzled about the ratio of baking soda to baking powder, since the soda is the more powerful leavener of the two, usually use less of it-- the amounts almost look reversed! However, the one problem with the cupcakes was that they didn't rise much at all. And then they sank as they cooled. Next time I'm going to experiment with adding an egg. Which will make them non-vegan, but fine for me!

Oh yes, and the other thing-- 26 to 28 minutes baking time?? Yikes! Mine were done at 20. Proceed with caution.

The frosting: I mentioned I had reservations about using the vegan cream cheese, since it tastes like mayonnaise. Which might be ok inside the cake, but not on top of it! However, I was pleasantly surprised that the combination of ingredients created a tasty frosting.

Now, the frosting WAS tasty, but the flavor was definitely kind of strange. Not unpleasant, just weird. Obviously, it wasn't weird enough to keep us from eating seconds! I don't know how to describe it, it just had an "off" flavor. I think I might try using butter next time instead of the margarine to see if that improves the taste. (Again, I know that will make them non-vegan.)

Bottom line: we loved 'em, weird frosting and all!


Chi miigwetch SCL: thank you to my son for creating this logo
CLICK to enlarge image